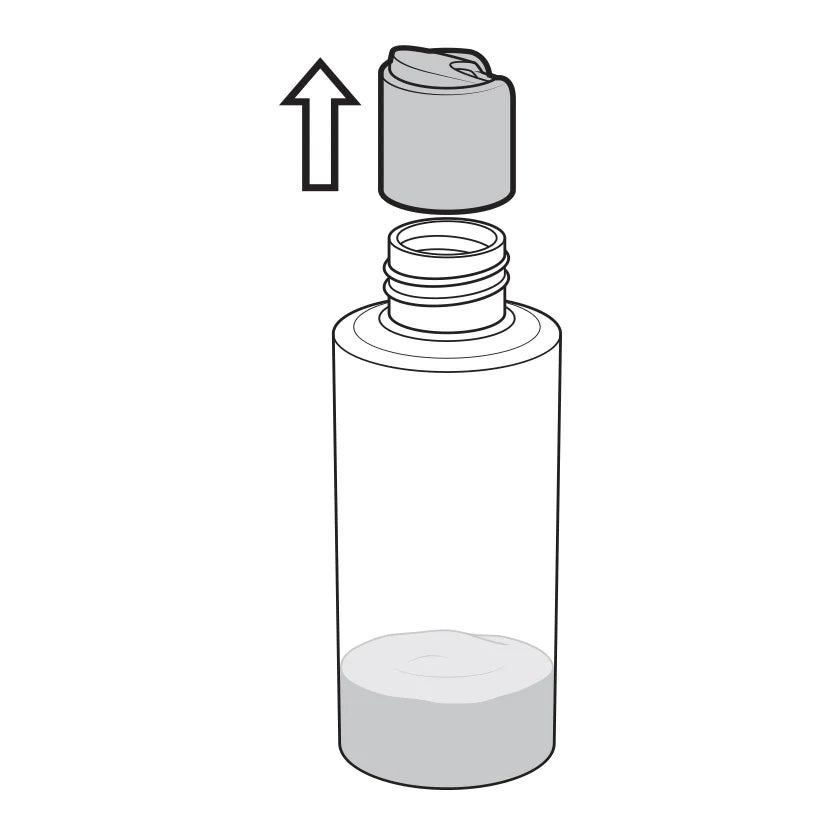
Step 1
Remove the bottle's original cap or pump when it becomes difficult to get out the remaining product.
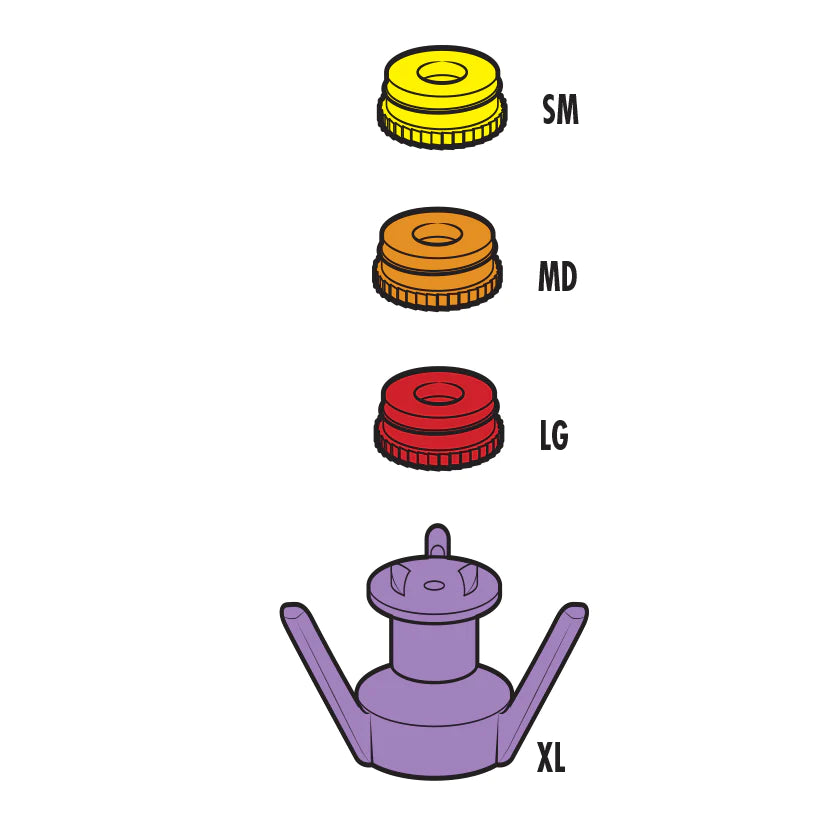
Step 2
Determine which parts fit your bottle. It could be the dispensing Stand alone, or in conjunction with an Adapter.

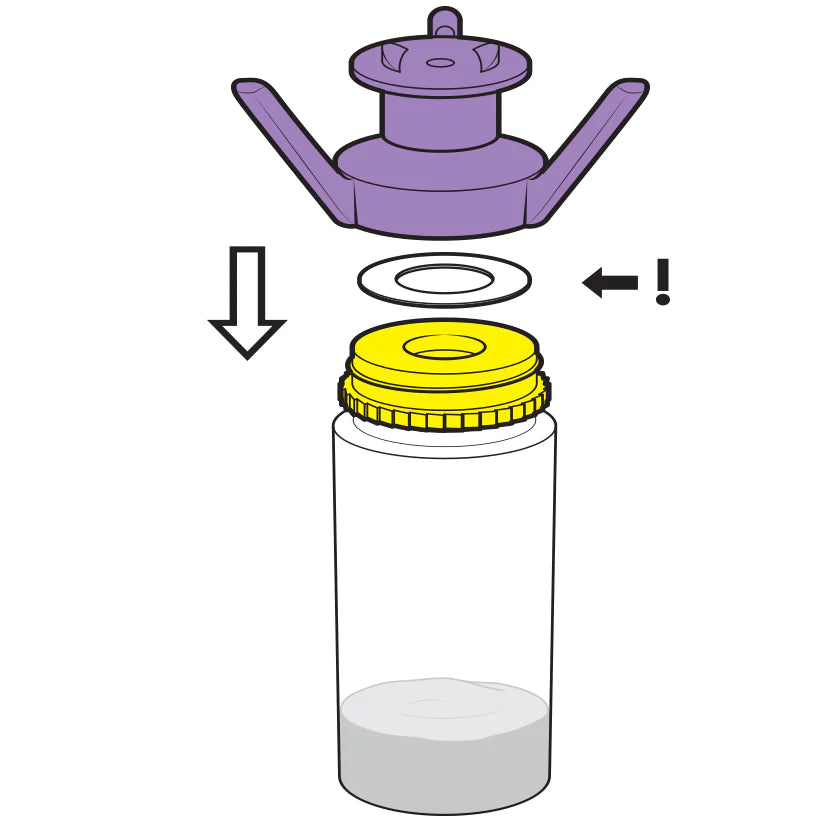
Step 3
If using one of the Adapters, make sure the correct-size gasket is inside, then twist the Adapter onto the bottle.
GASKETS AVOID LEAKS!
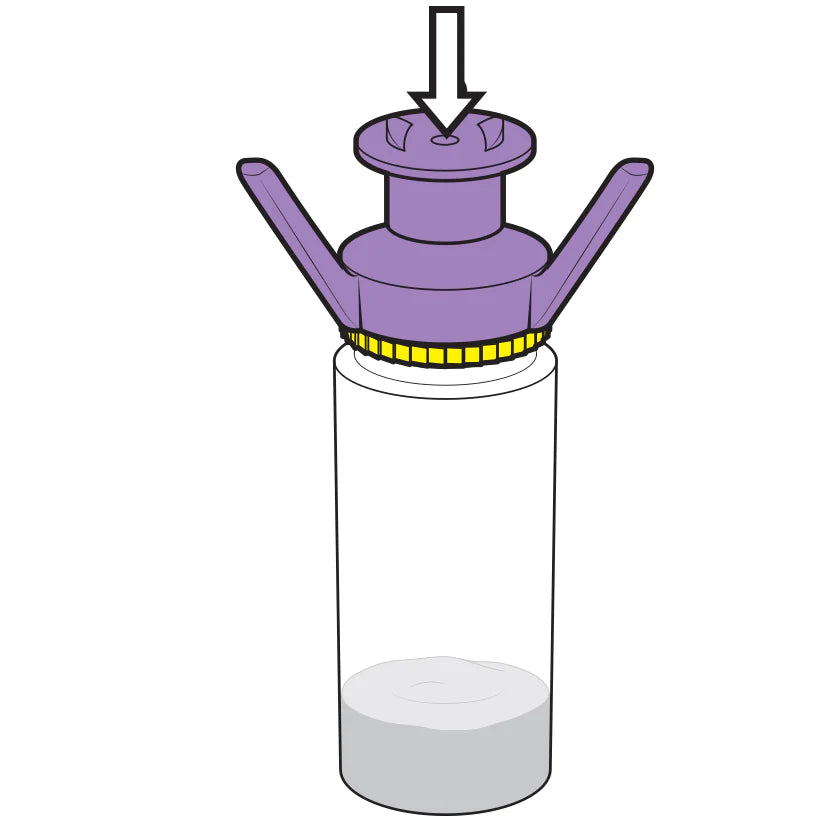
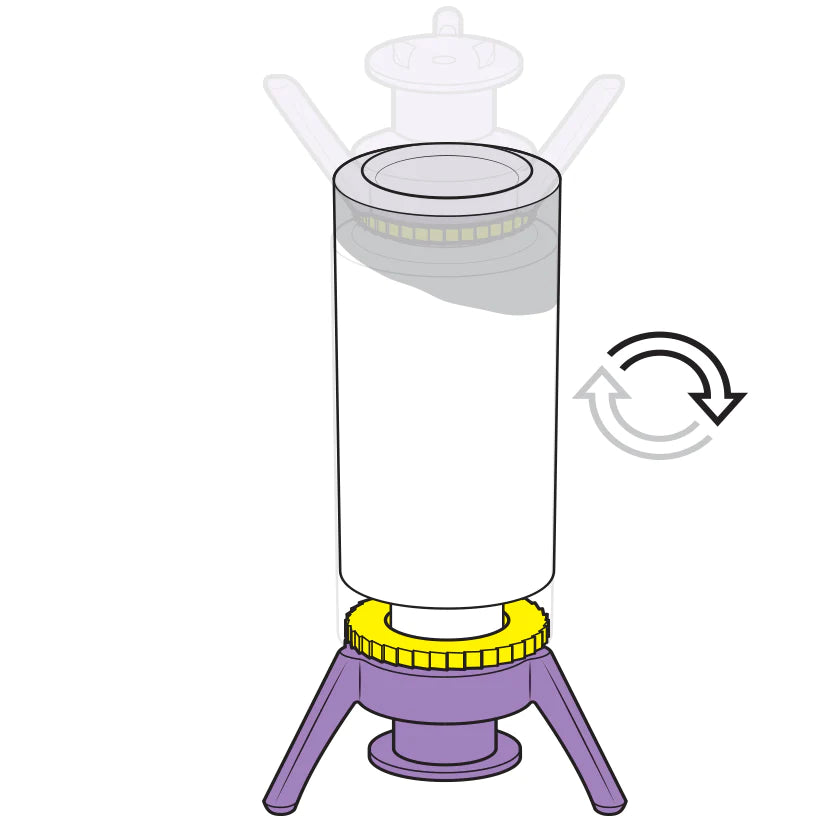
Step 4
Make sure the XL gasket is inside the Dispensing Stand and twist it onto the Adapter or directly onto the bottle.
Step 5
Lightly tighten the Flip-It!®system, and press the valve tip closed before flipping the bottle. (Note: If valve is open, bottles will wobble/fall over to let you know to close the valve.)
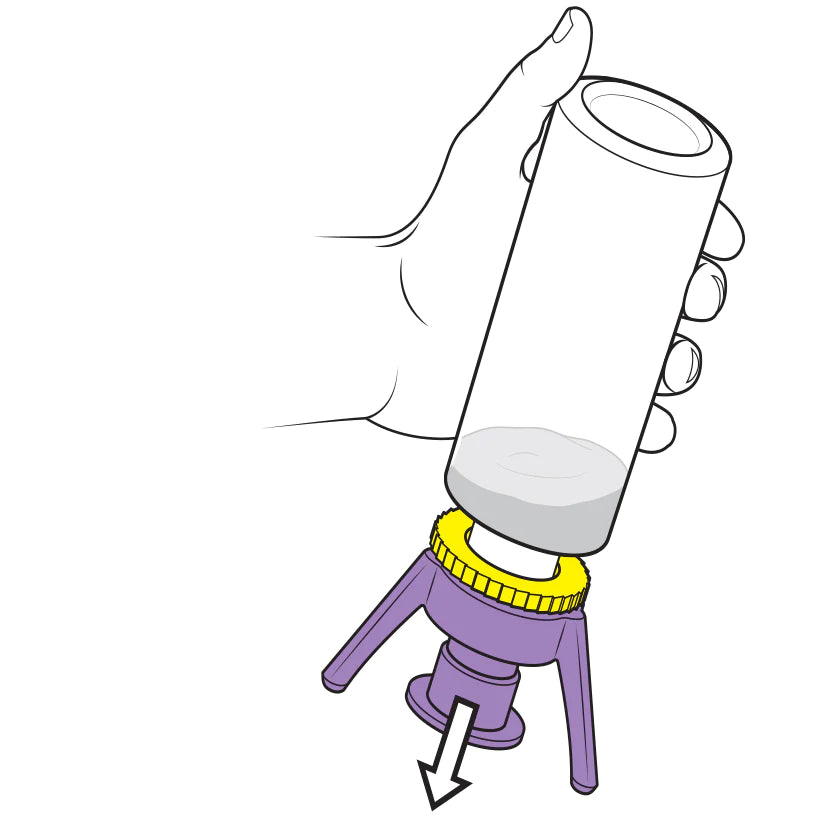
Step 6
Flip the bottle upside down and stand it on a solid surface. Allow some time for gravity to move the product down into the Flip-It!®Dispensing Stand.
Step 7
To dispense the product, first pull open the valve tip.
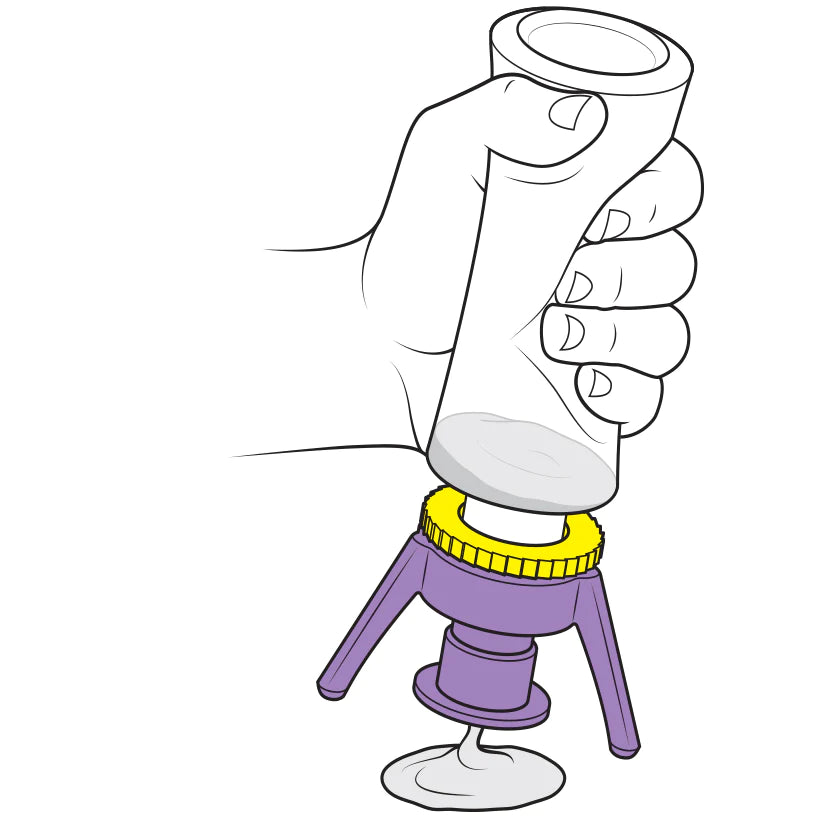
Step 8
Squeeze the bottle to get out the desired amount of product, then close the valve tip and keep the bottle standing upside down on the Flip-It!®